In the last blog, definition, application and security aspects of PUF were introduced. The blog points out the need of PUF based security solutions in IoT. Therefore, a question arises how one can generate PUF based fingerprint and use in an existing firmware IoT update solution. This blog will cover the practical aspects of the SRAM based PUFs. I am going to give detailed information of development board, its firmware and setup of development environment in this blog.
Hardware:
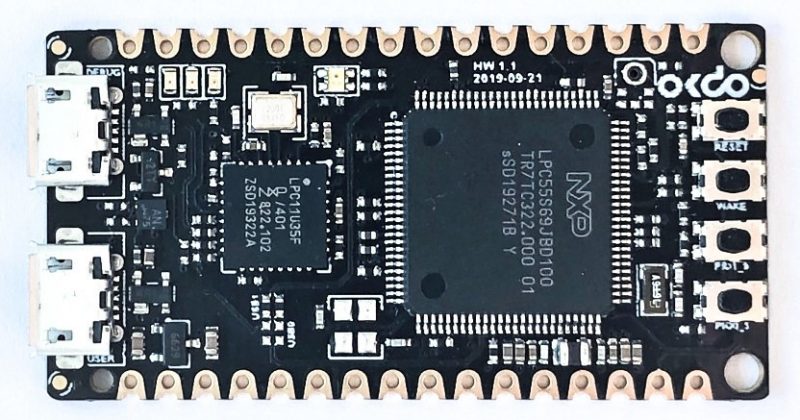
For the setup, we have used the E1 devlopment board from OKDO. This development board is based on LPC55S69xx microcontroller from NXP. The microcontroller contains onboard Physical Unclonable Function (PUF) using dedicated SRAM.
Software Setup:
- Download the MCUXpresso IDE from NXP. Complete the instructions as given on the website and install the IDE.
- Next, install a terminal emulator program to view the output from the OKDO board. For the setup, we have used Terra term.
- Further, clone the repository in MCUXpresso’s workspace folder. This contains the sample code for demonstrating the PUF functionality. The code has been modified to work with the OKDO E1 board.
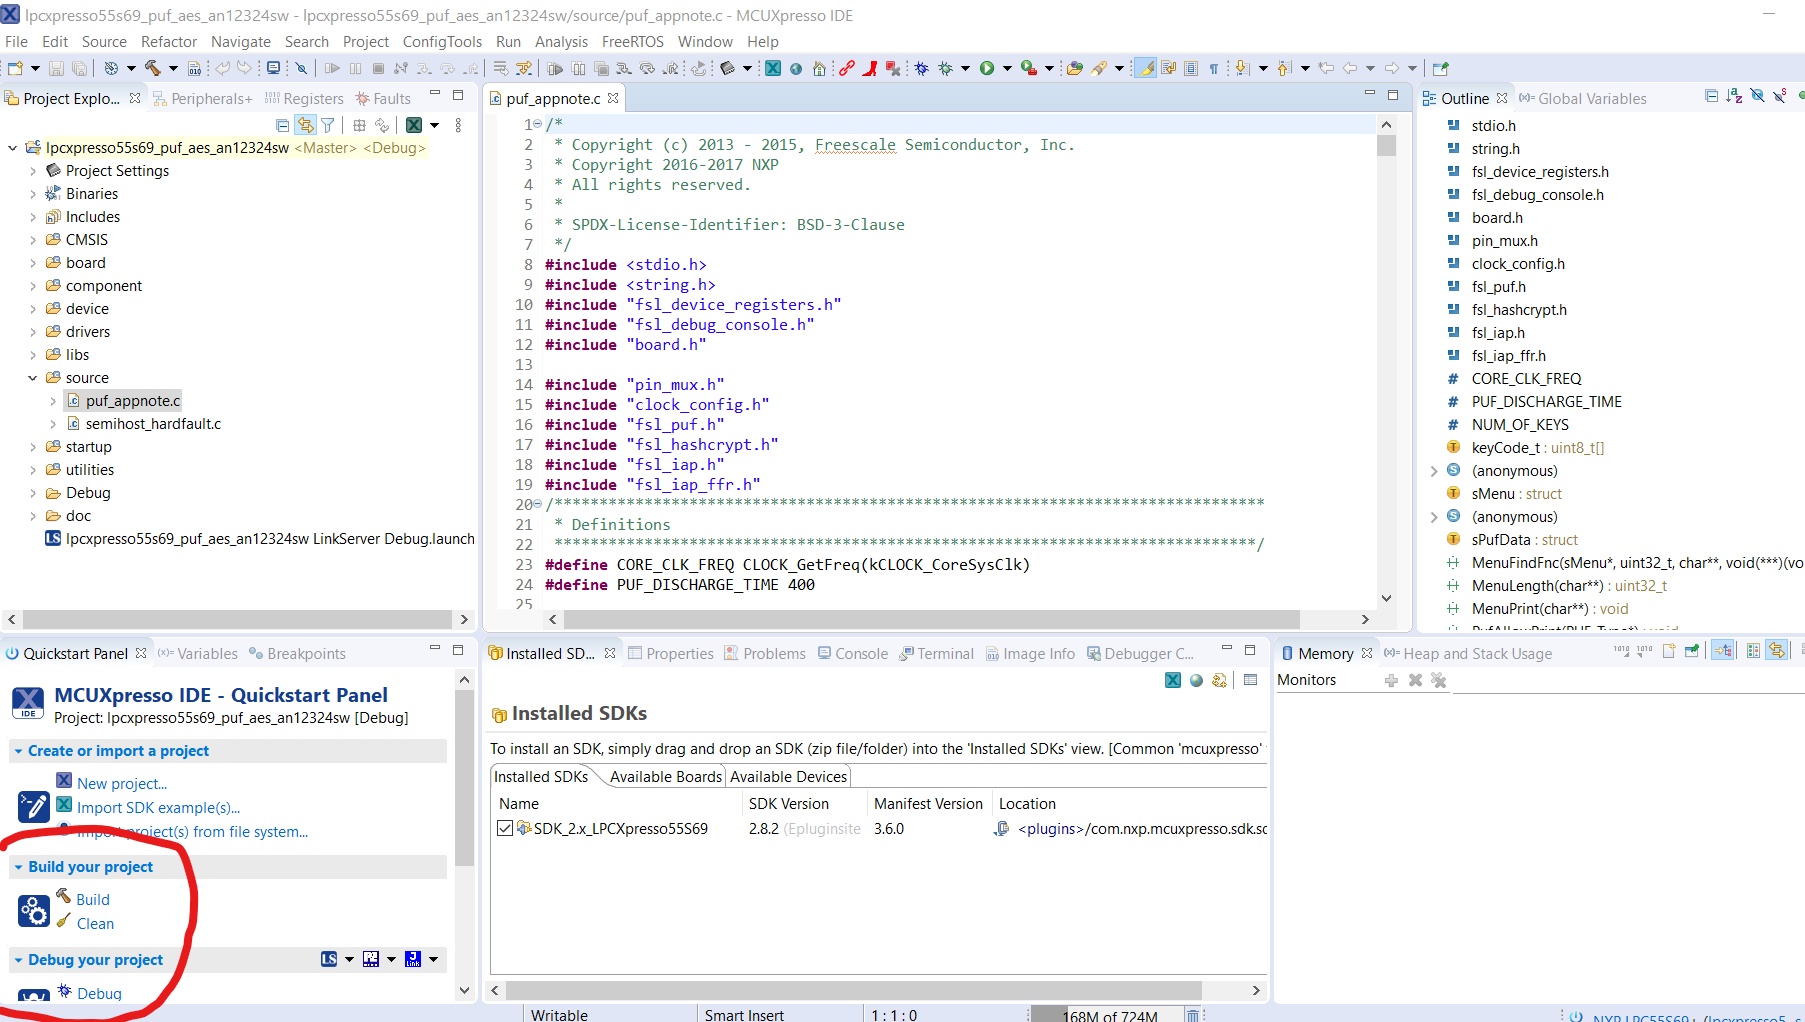
- Next, connect the OKDO development board via USB(use the Debug port). Once the board is connected, build and debug the project by clicking on Debug in the Quickstart Panel. The IDE will flash the code on the target development board and will enter into debug mode. Click on resume and let the program run.
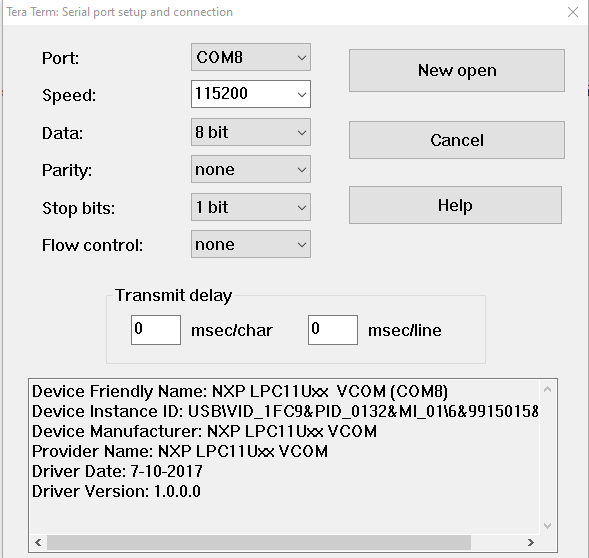
- Now, start the Tera Term emulator, setup the connection as above with your specific port value.
- Once, the setup is done, press the user reset button on the OKDO board. It will show logs similar to the screenshot shown below.
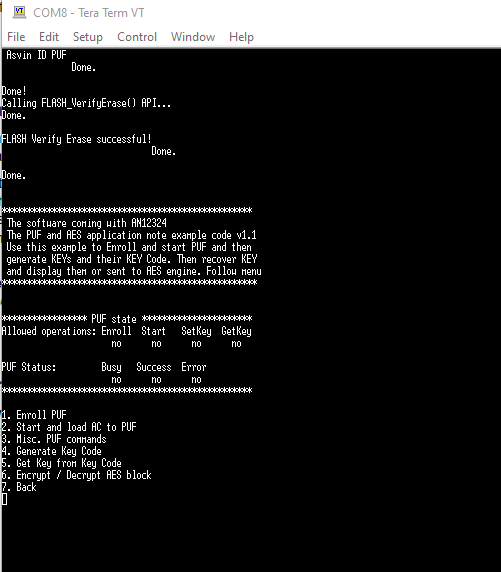
The menu displays the multiple options to perform actions on the board. These options are described below briefly. You can find detailed information about them in the application note.
- Enroll PUF : The enrollment is the first step to start using the PUF. In the enroll operation, the PUF periphery is first powered up (or initialized). and then the Enroll command is called. An Activation code (AC) is generated after this, which can be stored in RAM or flash memory for further use. Each time, the enrollment process is executed a unique activation code will be generated.
- Start and load AC to PUF: In this command, the PUF process is started and the stored Activation Code(AC) is loaded from the RAM or flash memory.
- Misc. PUF commands: This command provides miscellaneous functions related to PUF. They are Init PUF, Stop PUF, Zeroize PUF, Disable Enrollment and Disable key generation.
- Generate Key code: The Generate Key Code command enables you to create a user key or an intrinsic key.
- User key—A user key is entered to the PUF and the key code is generated out of the user key.
- Intrinsic key—An intrinsic key is randomly generated inside the PUF and you get only the key code.
- Get Key from Key Code: This command is used to get a key out of the key code. After combining the key code with the digital fingerprint, the key is retrieved.
- Encrypt/Decrypt AES block: This command enables you to encrypt/decrypt a 16-byte block of data using a key reconstructed by the PUF.
Conclusion:
It is quite easy to setup the development environment to start working with the SRAM based PUF. The setup requires only open-source tools. The demo illustrates the setup and PUF generation process. The PUF based keys can be utilized in cryptographic encryption algorithms for security. asvin BeeHive IoT update firmware uses encryption keys to generate device fingerprints for Iot devices.
Start with asvin Register now


